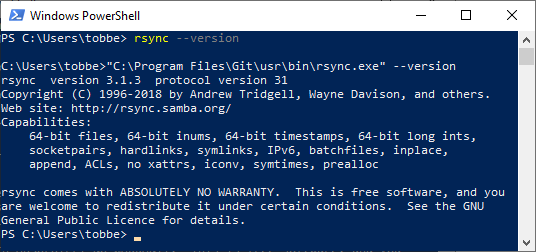
This guide will help you install rsync on Windows 10. It is assumed that you already have Git for Windows installed.

If you didn't already know, Git for Windows and its Git Bash environment is built using msys2, but it doesn't include all the binaries from that project. One of the binaries that exists, but that isn't included, is rsync. So what we need to do is to download the msys2 rsync binary, and place it somewhere Git Bash can find it.
- Go to http://repo.msys2.org/msys/x86_64/ and download the latest version of rsync (not rsync2). At the time of this writing that is rsync-3.1.3-1-x86_64.pkg.tar.xz
- Extract the downloaded archive. I'm using Total Commander with a .xz plugin, but 7-zip is also a great option. Download and install from https://www.7-zip.org/ if you need to.
- Copy the contents of the extracted archive (sub-folders and all) to where you have Git for Windows installed. For me that's
C:\Program Files\Git\. (The archive contains a\usrfolder, and so does the git installation directory. What you want is for everything inside of the\usrfolder in the archive to end up in the\usrfolder in the git installation directory, ultimately ending up with, among other files,C:\Program Files\Git\usr\bin\rsync.exe)
That's it. You now have rsync installed. You can test your installation by opening up a Git Bash command line window and running rsync --version. You should see it print out version information.
Now, if you want to use rsync from the Windows Command Prompt, or from PowerShell, there is one more step.
Create a new .bat file with the following content (adjust the path to match your environment)
"C:\Program Files\Git\usr\bin\rsync.exe" %* Name the file rsync.bat and place it somewhere in your %PATH%. I placed mine in C:\Windows\. Press Win + R and enter cmd. In the Command Prompt window that you just launched, enter rsync --version and it will find your .bat-file and run it, passing all arguments (that's what %* does in the command above) off to your newly installed rsync.exe
The first three steps above are based on https://serverfault.com/questions/310337/using-rsync-from-msysgit-for-binary-files/872557#872557 where you can also find instructions for setting up Pageant for SSH, if that's something you need.
I hope this short tutorial was useful to you. Happy rsyncing!